Mac Big Sur Virtual Machine on a Windows 10 VirtualBox Host
New Temporary Job
I’ve recently got a new temporary position working at a different office. My supervisor mentioned that the office used Mac machines. To try and get ahead of the game, I decided that I should start doing some work on a mac. The only problem is, I don’t have one. And I’m not sure I’m ready to fork out the money for one (if this temporary position turns out to be a permanent one, maybe we can talk).
So my next step is VIRTUALIZATION
I successfully have built a Mac Big Sur (Big Sur is the version of the Mac Operating system, MacOS) machine and have actually developed this site on it. I told my kids about it and my son asked me how I did it. This is my attempt at explaining what virtualization is and how I went about setting up my virtual Mac.
The simplest definition of virtualization or a virtual machine (VM) that I could find is a program on a computer that works like it is a separate computer inside the main computer. The program that controls virtual machines is called a hypervisor and the computer that is running the virtual machine is called the host. This definition from https://kids.kiddle.co. If you want to get a higher level of understanding check out https://www.ibm.com/cloud/learn/virtualization-a-complete-guide or https://en.wikipedia.org/wiki/Virtualization
I’m going to use a Type-2 or “hosted” hypervisor (https://en.wikipedia.org/wiki/Hypervisor), specifically one called VirtualBox.
Mac Big Sur VM on a Windows 10 host
VirtualBox Set Up
Download Oracle VM VirtualBox (version at time of writing this is 6.1.30) and the VirtualBox 6.1.30 Extension Pack.
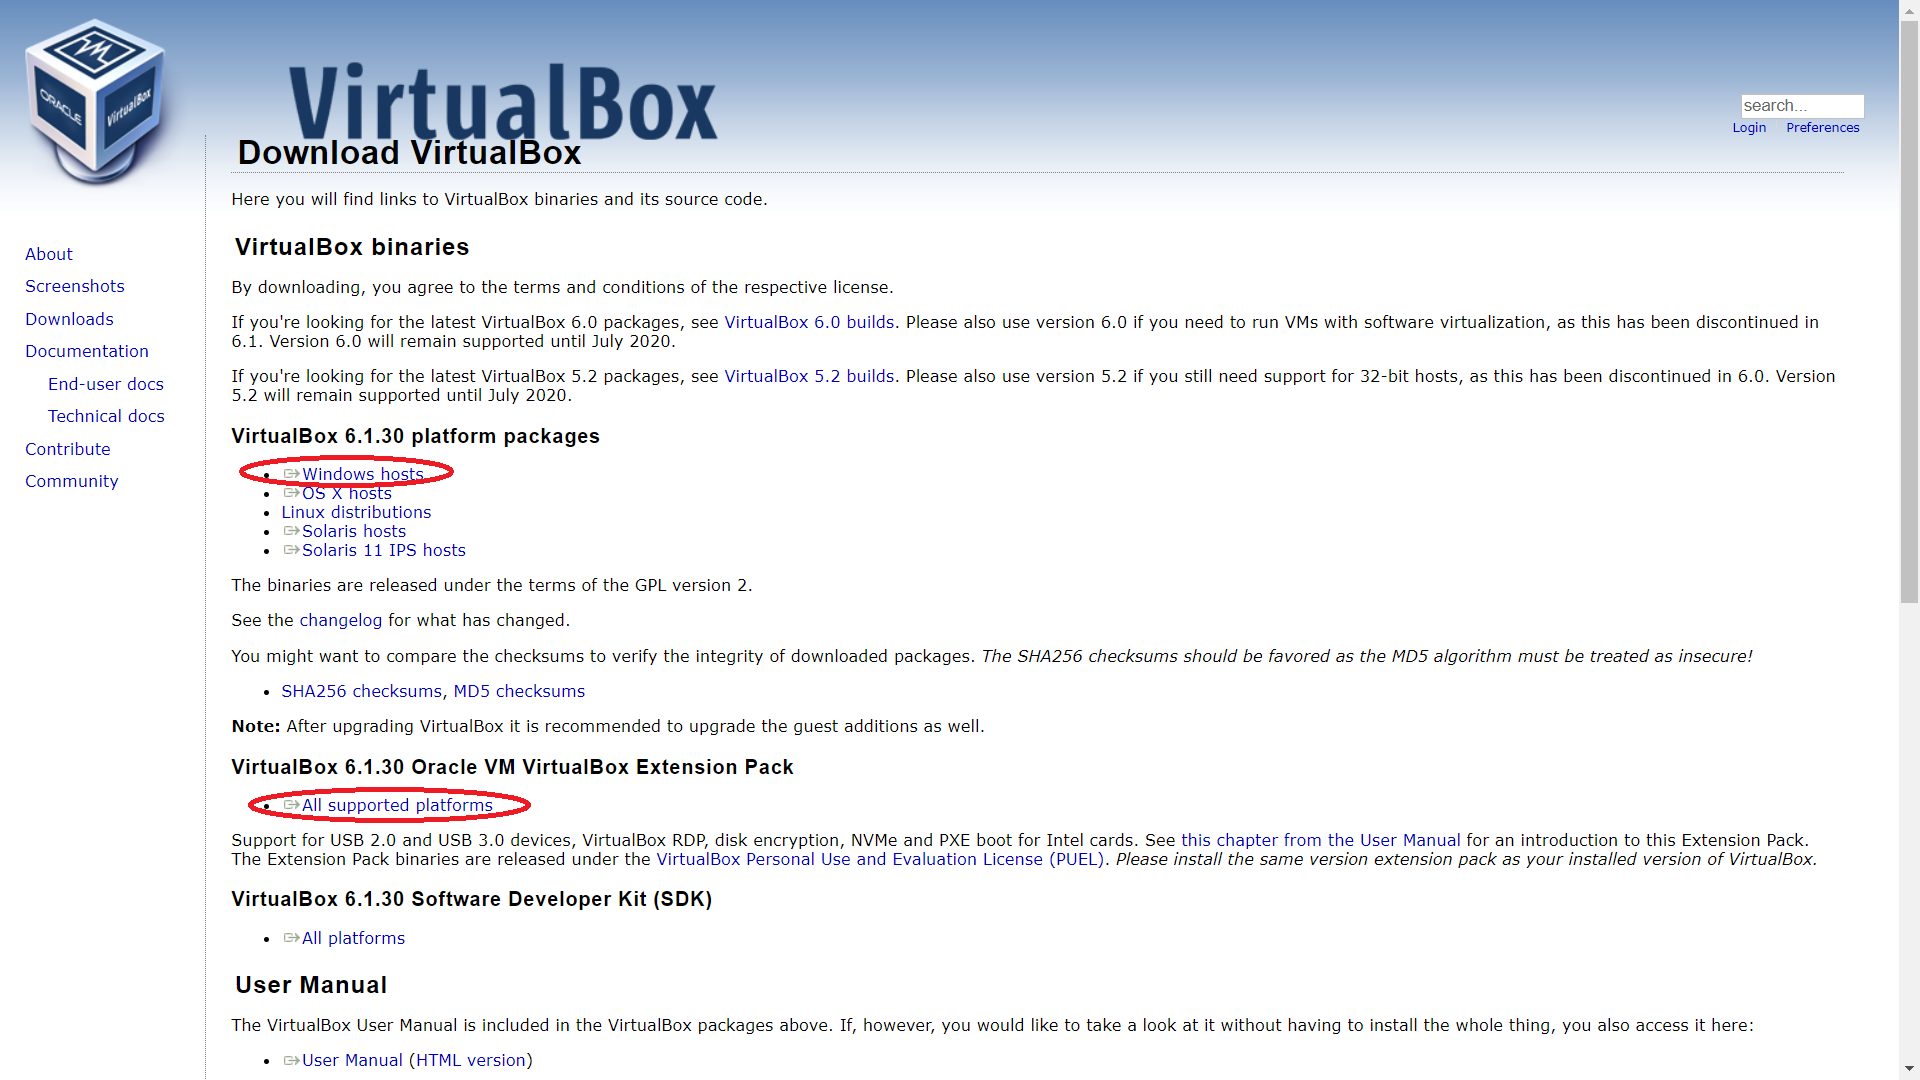
Download Oracle VM VirtualBox and Extension pack
After VirtualBox is downloaded, double click the downloaded file and click next on the screens to install with the default settings. After the installation, open the program and we’ll install the extention pack.
Open the installed VirtualBox program and click Preferences (the tools icon) to open up the settings. Click the Extensions and then click the folder icon on the right with the green plus icon (+). Select the Extentions file that you downloaded from the Virtualbox website. Click install and agree to the VirtualBox agreement. After the Extentions install click “Ok” to get back to the Oracle VM VirtualBox Manager Window.
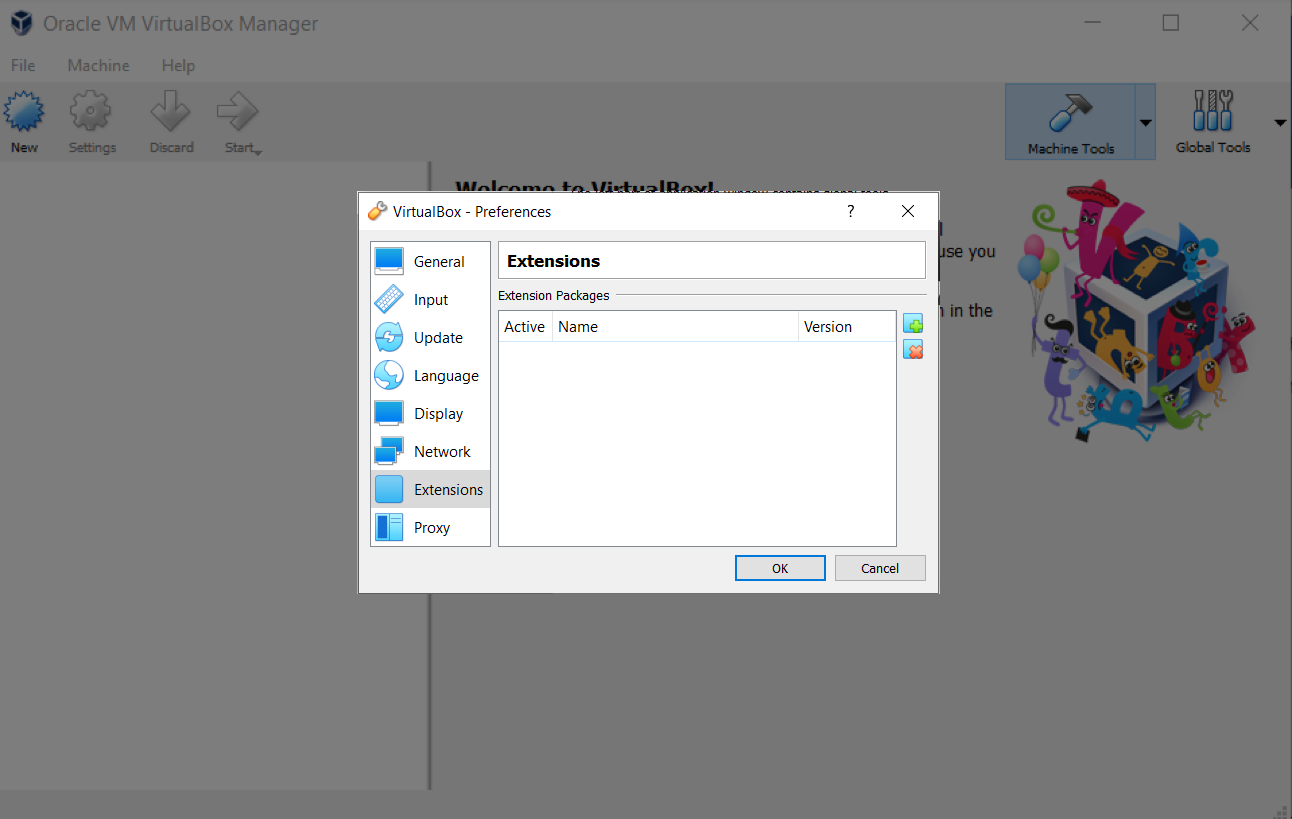
Installing Oracle VM VirtualBox Extension pack
Create a New Virtual Machine
On the VirtualBox main screen, click the New at the top left corner or press Ctrl + N
Select the Name and Type of Virtual Machine
I provided mine MacOSBigSur The Big Sur version is actually MacOS 11 but we select the Mac OS X (64-bit) as it is a base Mac OS 64 bit. More on the MacOS operating system here and more on the MacOS releases here).
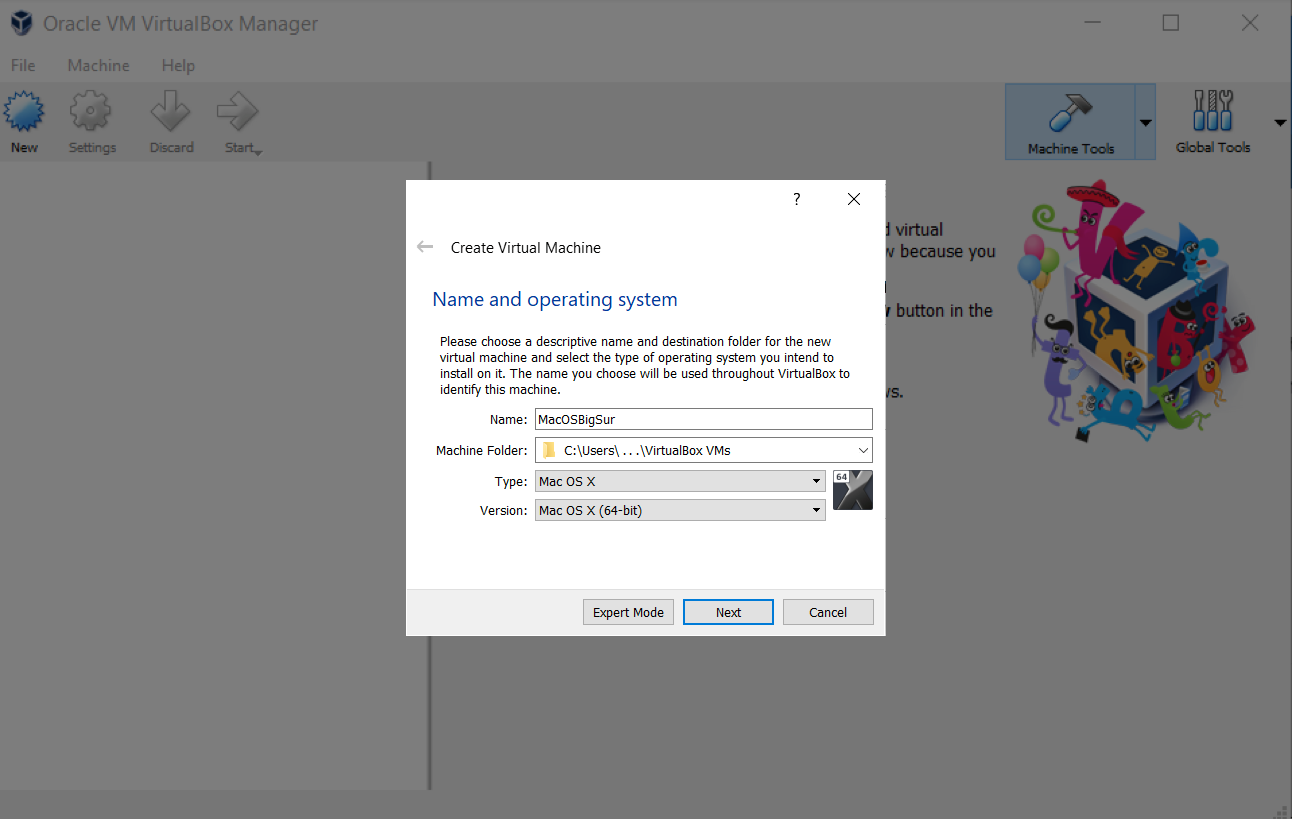
Selecting name and OS type
Virtual Machine Memory Size
Your virtual machine will be using your computer’s or host machine’s memory. Windows 11 requirements states that it needs 4 gigabytes (GB) of RAM or greater. Your host machine should have more RAM if you will be running Virtual Machines. (Yes, you can run more than one simultaneously). Apple’s macOS Big Sur technical specification says Big Sur requires 4 GB of RAM for Big Sur. VirtualBox documentation suggests that at least 512 MB of RAM (but probably more, and the more the better). This is the sole VM I will be running, so going with the more is better idea, (and I have 16GB to work with on my host), I’m going to go with 6144 MB which is approximately 6 GB.
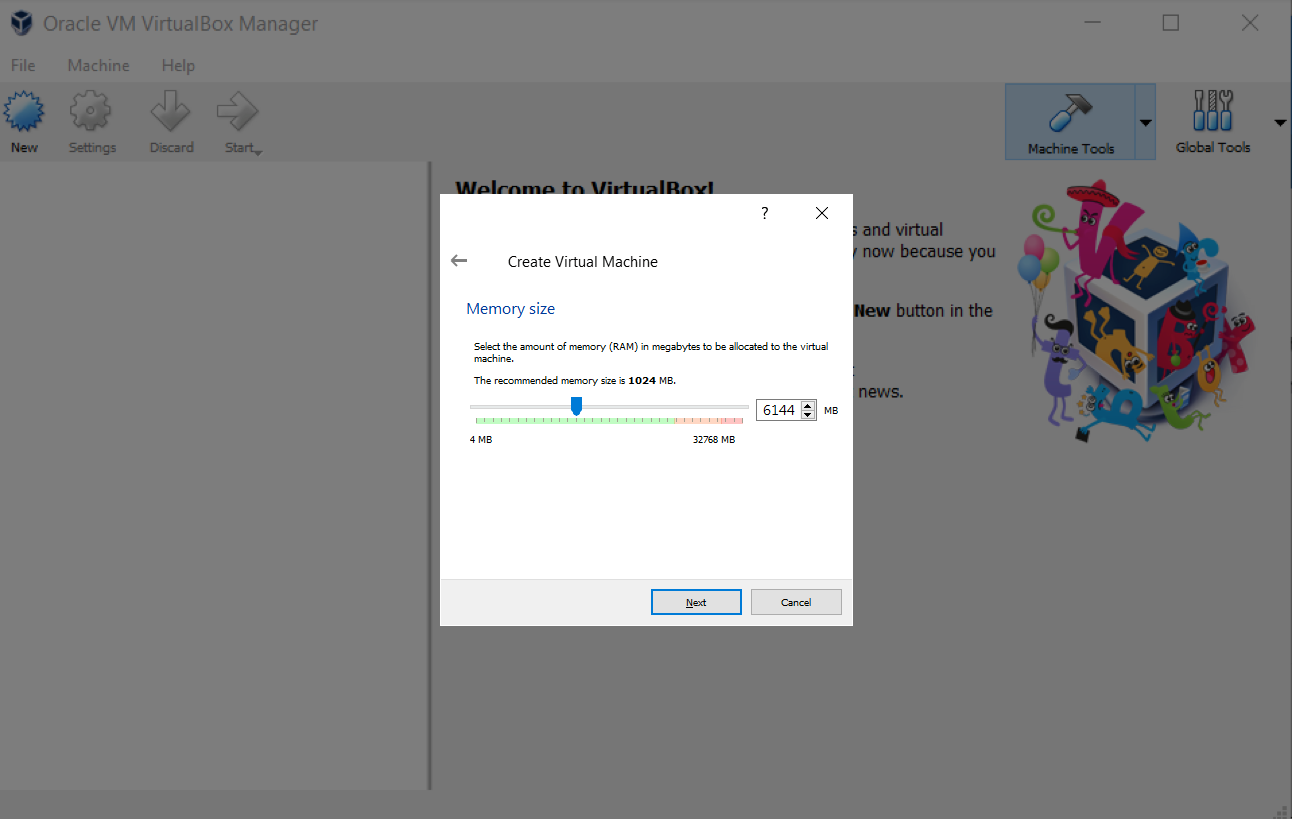
Selecting memory size for VM
We will create a virtual hard disk now. Notice the recommended size of the hard disk says 8.00 GB this is pretty small. Especially since Mac says you will need 35.5GB storage available for Big Sur. Keep in mind as the RAM used in the virtual machine is taken from the host, the same goes for the hard disk space. Your Windows host machine should have a large hard disk that the virtual machine can use (60 GB at least). But we’ll set the size later.
Selecting memory size for VM
The hard disk file type is going to be VHD (Virtual Hard Disk). You can read more information on the differences in hard disk file types.
Selecting memory size for VM
As pointed out above your virtual machine should be at the very least 60 GB. And clicking “Create” will create your virtual machine.After the virtual machine is created, close VirtualBox.
Selecting memory size for VM

Lauching Virtual Mac
The following commands will modify VituralBox to allow Big Sur image (.iso file) to be installed:
Click the Windows Start Menu and type cmd. Right click on the Command Prompt App and click Run as Administrator. Then past the following commands:
|
|
Launching BigSur machine, Installing Big Sur image Open VirtualBox again and select the MacOSBigSur machine and click “Start” to launch the Big Sur virtual machine.
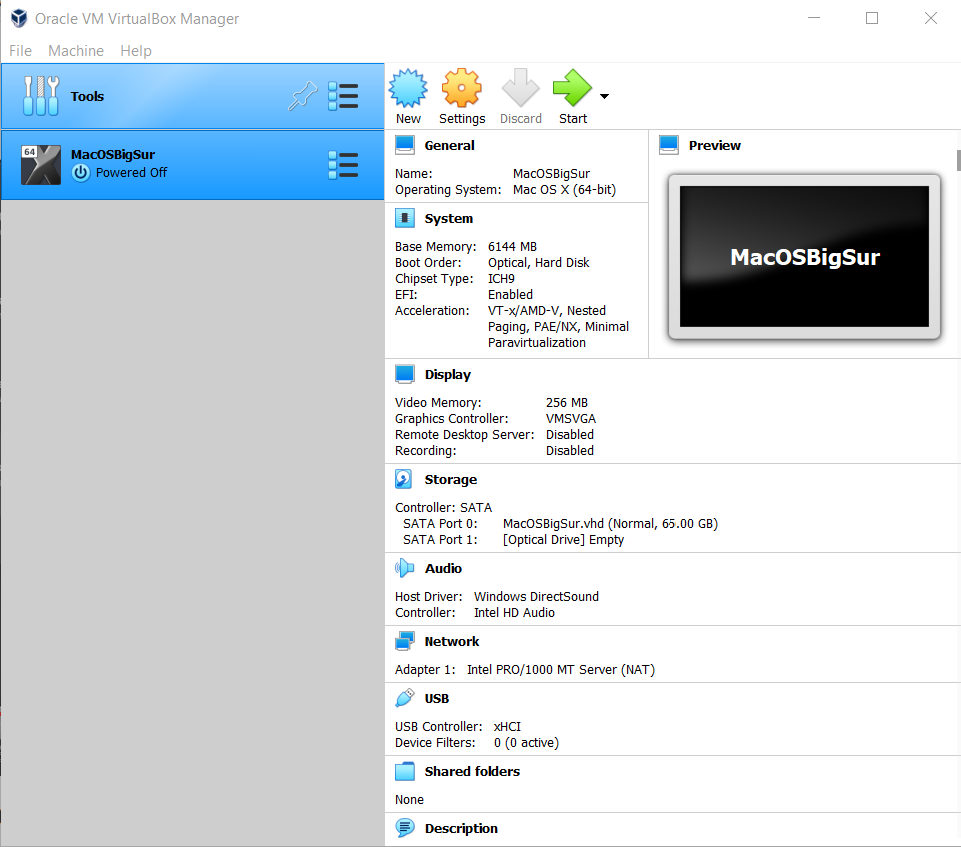
Start Big Sur Virtual Machine
You then have to select the iso image the machine will start on.
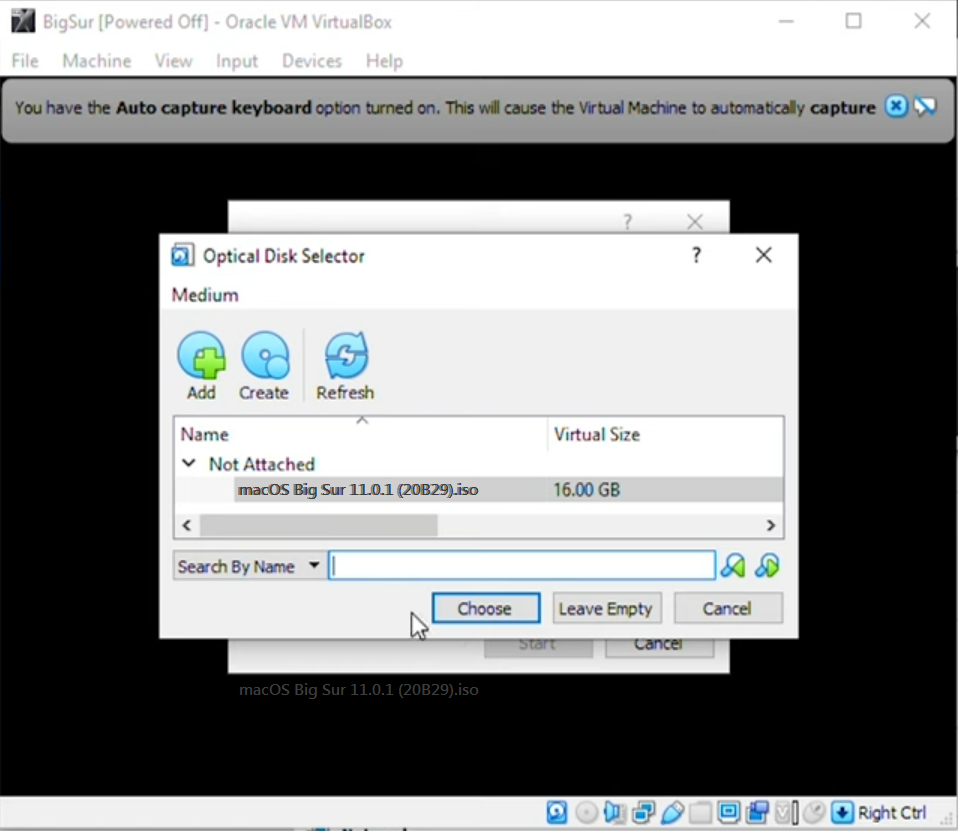
Select macOS ISO image
After clicking “Choose,” the machine will boot in recovery mode where we can select how to boot the operating system. Click on “English” and select the arrow to proceed .
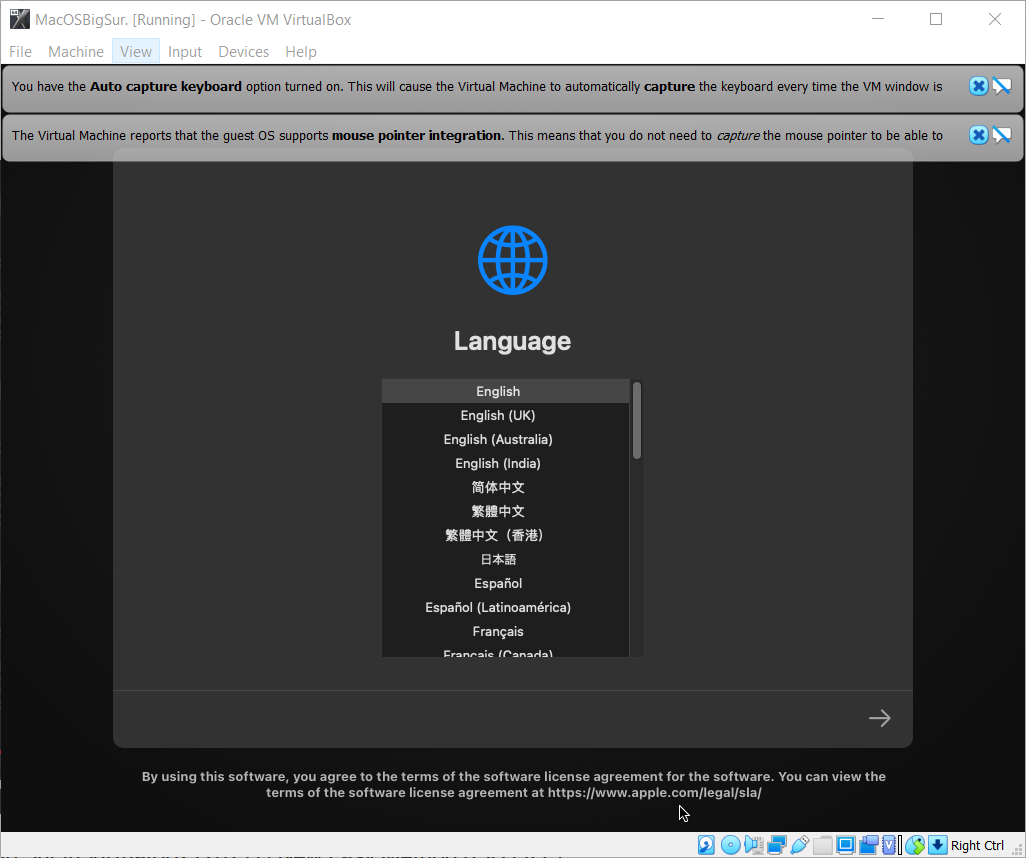
Selecting Language
You will then get to the screen where the available volumes will be examined. We will be using the “Disk Utility” to format the drive to make sure it’s correctly formatted for the installation of macOS Big Sur image.
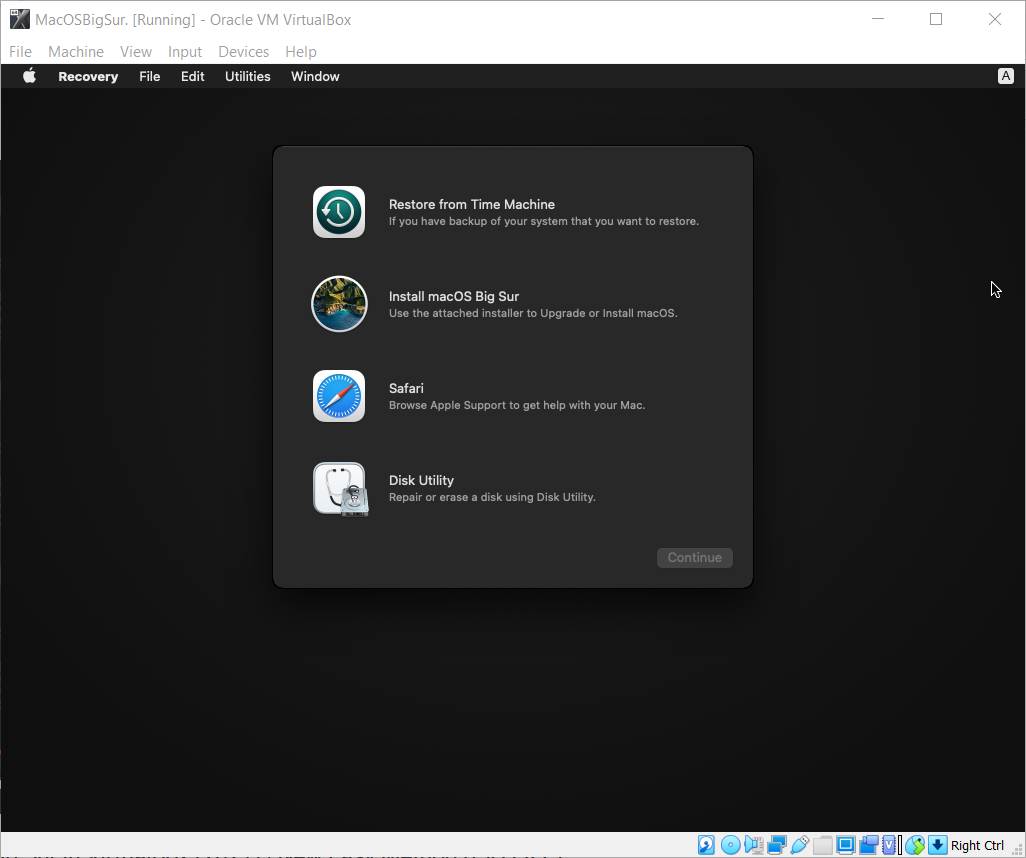
Using the Disk Utility
Select the virtual disk to format, “VBox HARDDISK Media” click the Erase menu item at the top of the screen.
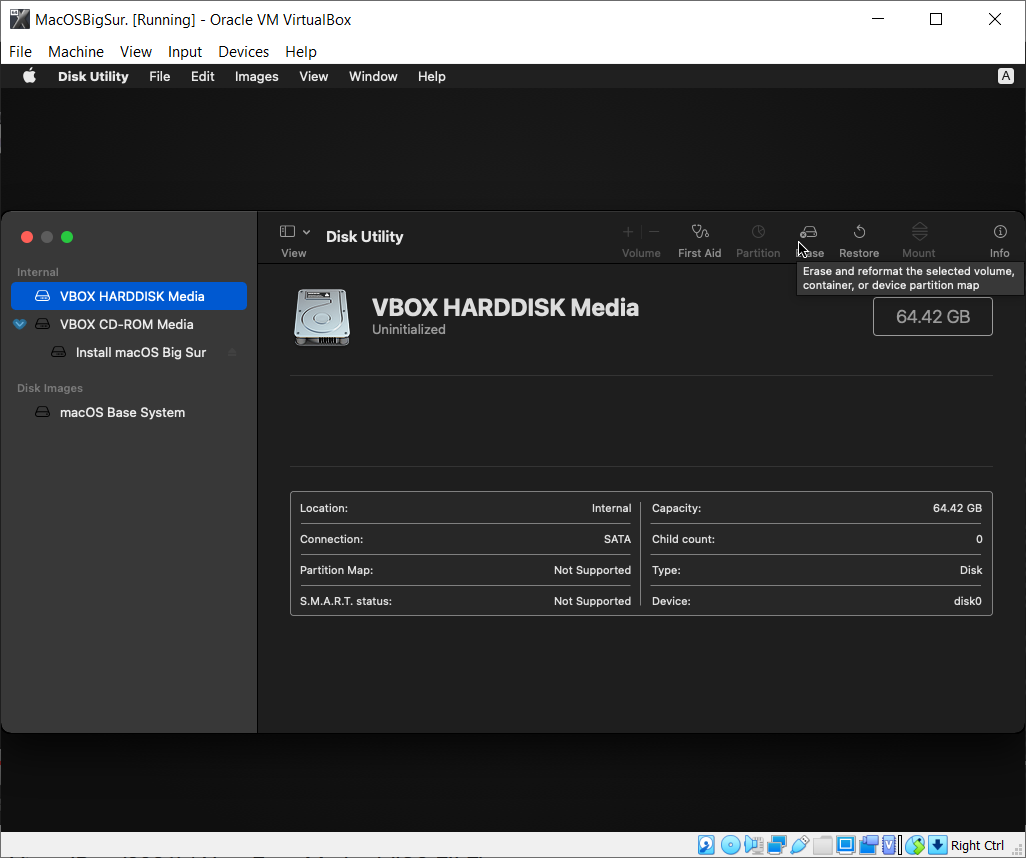
Format Disk
Provide the volume a name and click “Erase”
When the format is complete click “Done” and close the window by clicking the red X at the top left of the screen. We can now install the macOS Big Sur operating system. Select Install macOS Big Sur, click continue, and agree to the license agreement
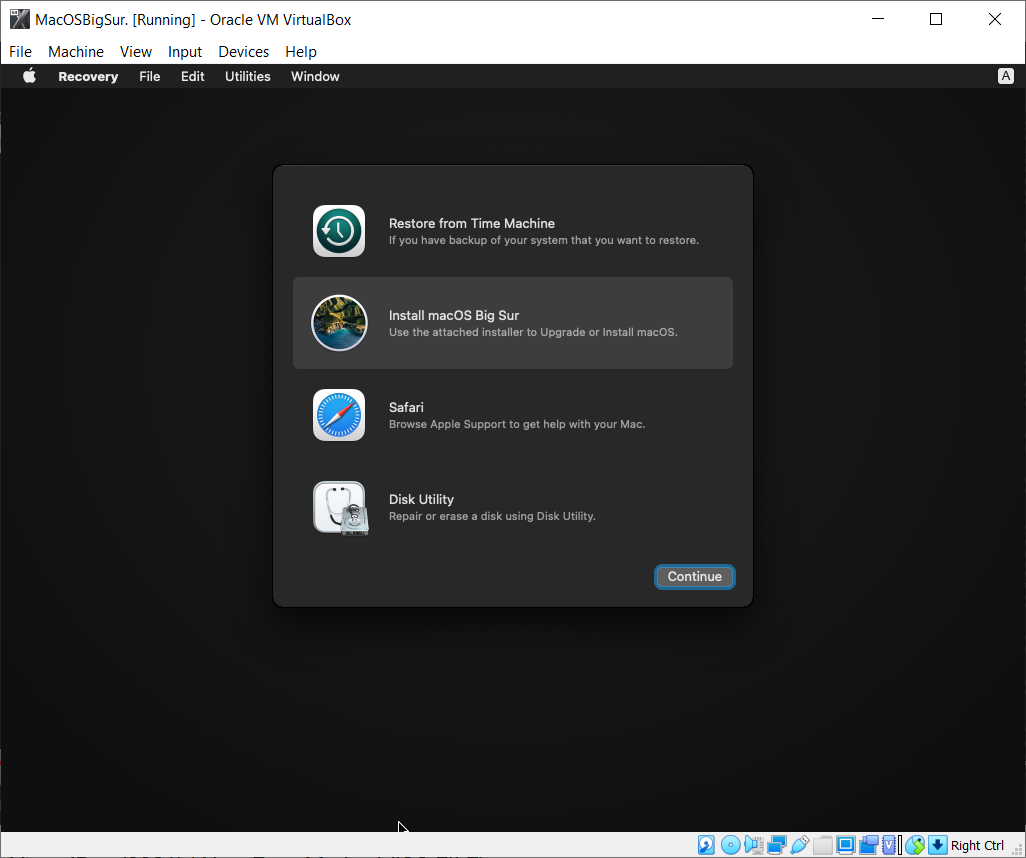
Install macOS Big Sur
Select the disk where you want to install macOS and click continue
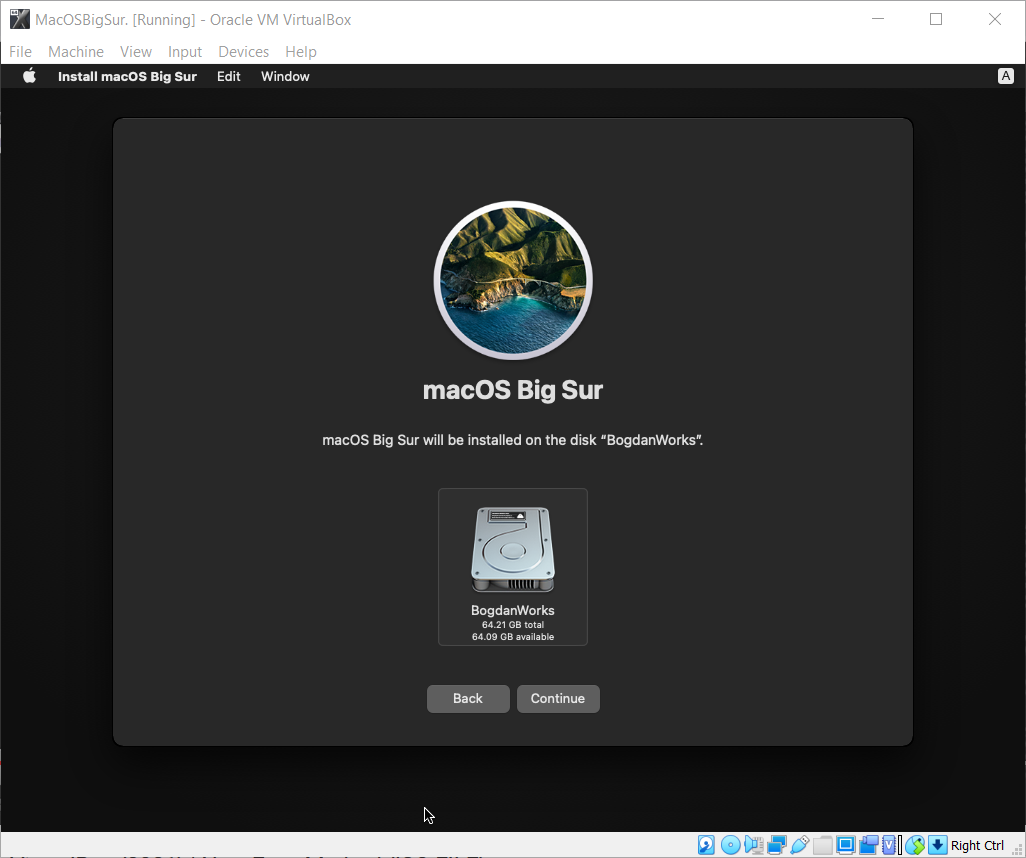
Select Disk To Install
Once the installation completes, you’ll then be able to configure your machine as Apple products ask you to do upon first boot up. After this your machine is pretty much set up.
Conclusion
Setting up a virtual macOS Big Sur machine will allow you to really test out what it is like having a mac. Keep in mind it will not be as smooth as actually having a mac. I’m enjoying toying around with the machine and I am planning to get my own mac machine in the future. Hope you enjoyed this and maybe I’ll write up some things that got my virtual mac running even nicer. Until then!